Origami Box Instructions
Printable Instructions and Video
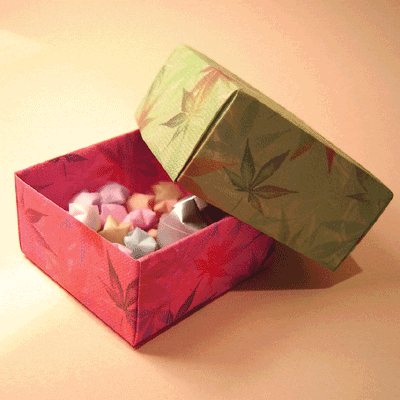
This design, known as the "Masu" box is the most common origami box around. I learned to make it in school, and having made many different types of boxes, I think this one is the best.
Its easy to make a lid for it too: just use a slightly bigger piece of paper.
So use colourful paper, double-sided is best, and make lots: then you'll be so organised! They are great for holding lollies, trinkets, jewellery... well just about anything really!
Video Instructions
Diagram Instructions
For a printable .pdf version of the box instructions, click here.
You will need Adobe Reader installed on your computer in order to open the .pdf file. You can get Adobe Reader here
 |
 | |
|
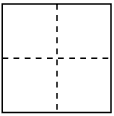
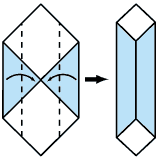
1. Start with a square piece of paper. Fold the paper in half horizontally and then verically, so the creases look like this. |
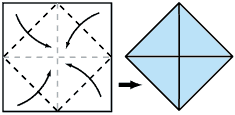
2. Fold the four corners of the paper toward the center point |
 |
 |
 | ||
|
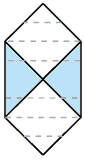
3. Fold the top and bottom of this square into the center and open out again to create these creases. |
4. Open out the top and bottom triangular flaps. |
5. Fold the sides of the model into the centre, creasing well. | ||
 |
 |
| ||
|
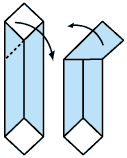
6. Fold down top corner of model and then open out again. |
7. Fold down model in the other direction |
You should now have 2 new diagonal creases like this. |
 |
 | |
|
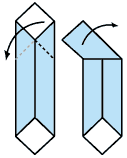
8. Repeat step 6 & 7 at the other end of the model, so you have the new creases at both ends. |
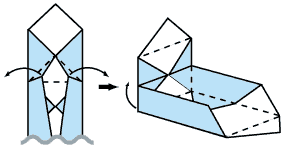
9. At one end of the model,Open out model along the creases you just made. This will raise the top portion of the model vertically. |
 |
 | |
|
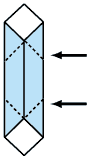
10. Fold top of model over into the box. Its taking shape! |
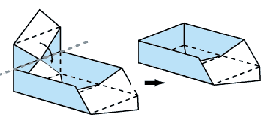
11. Repeat Step 9 and 10 at the other end of the box... and its finished! To make a lid, just make another box, but start with a slightly bigger piece of paper. |
Browse other boxes like the Origami Box